 All IUP students, faculty, and staff who are connected to the university account email address (XXXX@iup.edu) have access to Crimson Connect.
Users can complete their basic profile information, contact information, interests, privacy settings, and notification settings upon logging in to the system. See below for detailed instructions on setting up the user profile.
Accessing Crimson Connect
- Go to iup.campuslabs.com/engage/.
- Click Sign In at the top right corner of the public site.
- Log on using your IUP ID (four letters) and password.
Creating Your Account
Set Up Your Basic Profile Information
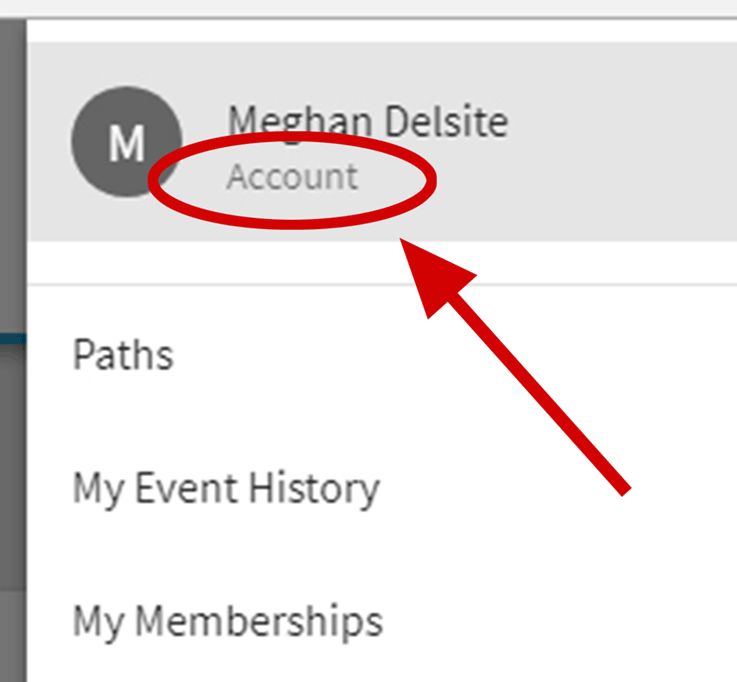 Click Account in the pop-out menu after clicking your initial.
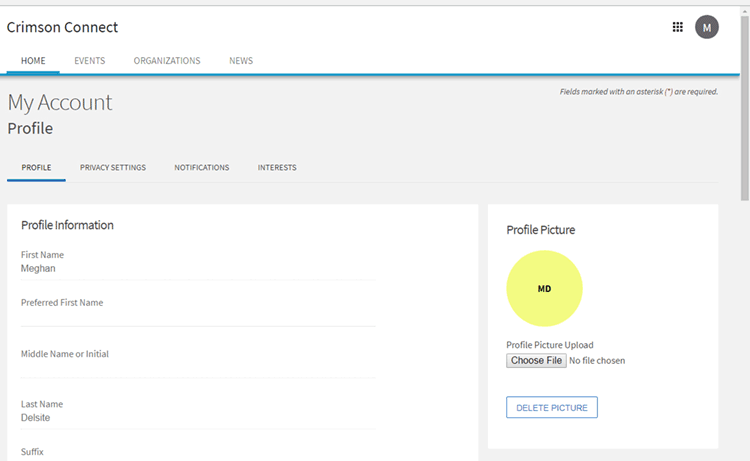
- Upload a profile picture.
- List a preferred email address other than your @iup.edu email (optional).
- Connect Social Media Profile Links, including your Facebook, Twitter, or LinkedIn (optional).
- Note: Your social media accounts will be displayed anywhere your name is displayed (e.g., an organization roster).
- Note: You do not need to enter a Preferred First Name, Middle Name, Suffix, or Hometown, nor need to complete any information under the “Demographics” section, but you may do so if you choose.
- Note: Any contact information you provide or edit here will only be used within Crimson Connect. If you have changes to make to your home/permanent address, please contact the Registrar to update the system accordingly.
Designate Interests
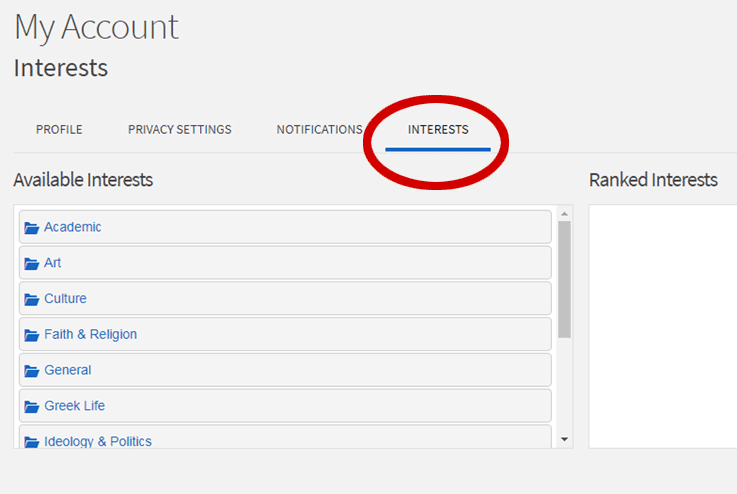 Click Interests in the gray navigation bar. Anything you note as an “interest” will be used to provide customized recommendations for organizations on campus. This will help you find clubs that match with your personality and goals.
- Go through the folders and select the interests that appeal to you most. You can update your interests at any time, so as you progress through college, changing these to reflect your passions will be helpful.
Text Message Notifications:
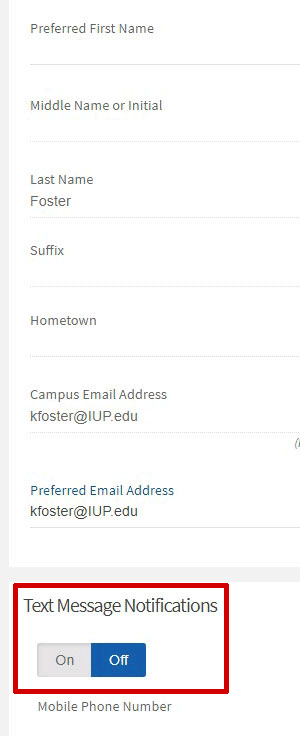 Providing your cell phone number and turning this feature “On” allows for organizations you are a part of within Crimson Connect to send you text messages. This action is completed in the “Profile” section; you will not see a button for test message notifications in this section.
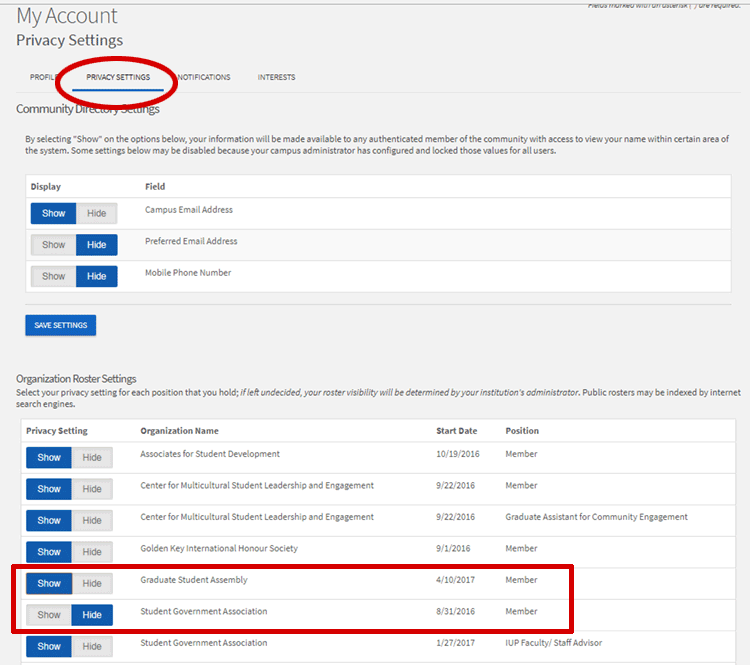
Set Your Privacy Settings
Community Directory Settings:
Choose which pieces of contact information you would like to “Show” to other campus users when your name is displayed within Crimson Connect (e.g., an organization roster).
Organization Roster Settings:
You may choose to hide your membership or officer positions for any organization so that you will not be displayed on the organization's public roster. However, IUP policy dictates that if you are the president/primary contact of an organization, you must be “public” on the roster. If you do not, your organization will lapse in recognition and will not be able to seek a budget through the Co-op, attend IUP Day or Winter Warm Up, or participate in other official university events. The officers of any organization will still be able to view members who have elected to “Hide” their public membership.
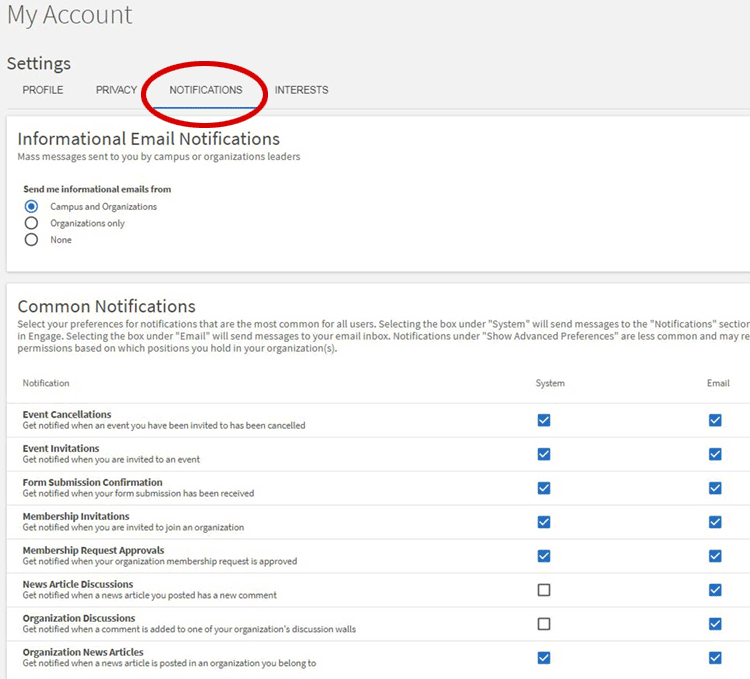
Set Notification Settings
General Email Notifications:
It is strongly recommended that you keep your email notifications set to “From Campus and Organizations.” If you alter your email notifications, you will still get messages sent to your Crimson Connect inbox. However, you may miss important, time-sensitive messages by not having them sent to your email.
Navigating Your Home Page
“Explore” is the default view when users log in to the community. Clicking on Explore (click on the dark gray grid in the top right corner) will take you to the Crimson Connect home page, where users can see important campus alerts, their organization memberships, check out upcoming events, read news posts, find shortcuts to their cocurricular Paths, and helpful Campus Links. The Explore view is also where users can view organization pages and access content created by organization officers or administrators. Every user in the community will have access to the Explore View.

Events
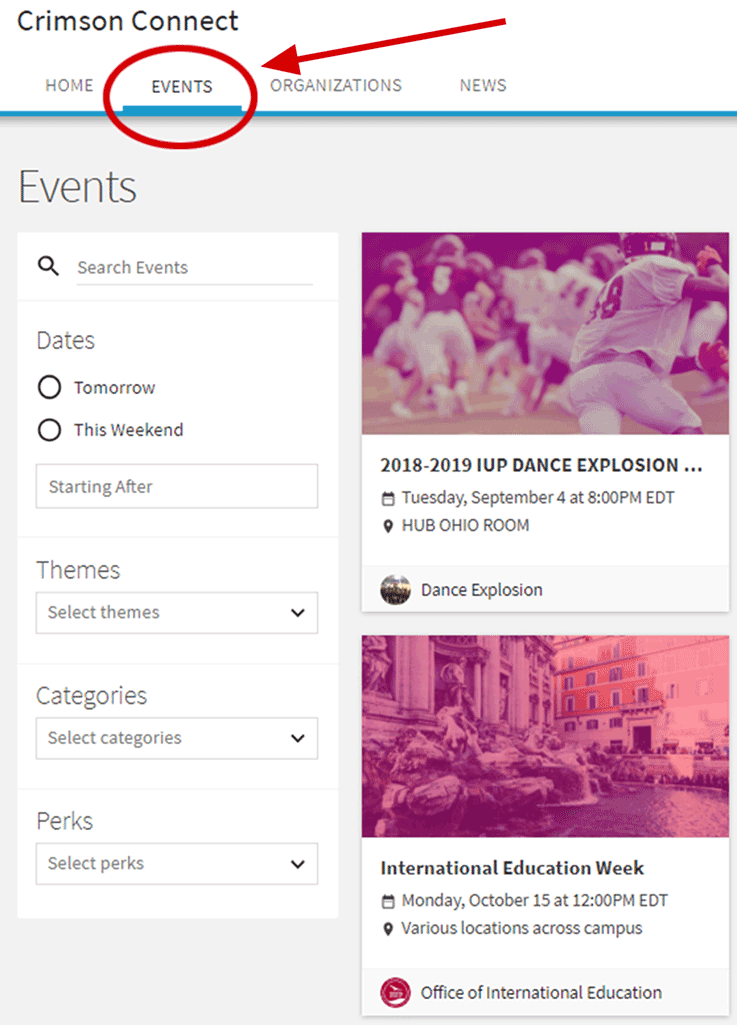 The public Crimson Connect site is accessible to anyone with an internet connection. Organizations in Crimson Connect can choose whether the events and content they create is shown to “Anyone in the World,” “Students & Staff at IUP” (users must be logged in with their four ID letters), or “Organization Members” (only visible to members on their roster).
- Clicking Events in the white toolbar will allow logged-in users to access the complete listing of events registered to “Anyone in the world” and “Students & staff at IUP.” If you are a member of that organization, events that are visible to organization members only will also be shown here. You can search for events by date, name, theme, category, and perks (free food or free stuff).
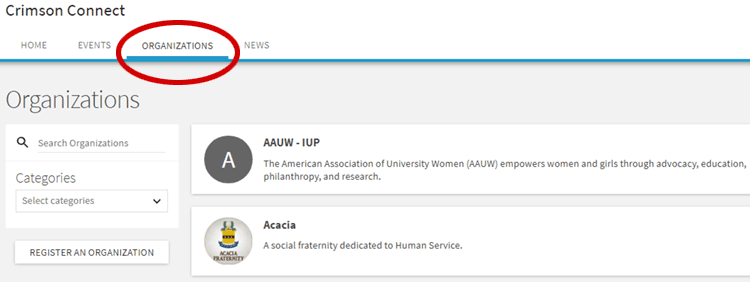
Organizations
- Clicking Organizations in the top toolbar will allow the user to access the complete listing of organizations in the system. Search for organizations alphabetically by name or by category. Clicking on an organization's name will provide basic profile information for that organization as well as any content they have chosen to display publicly or to campus users.
News
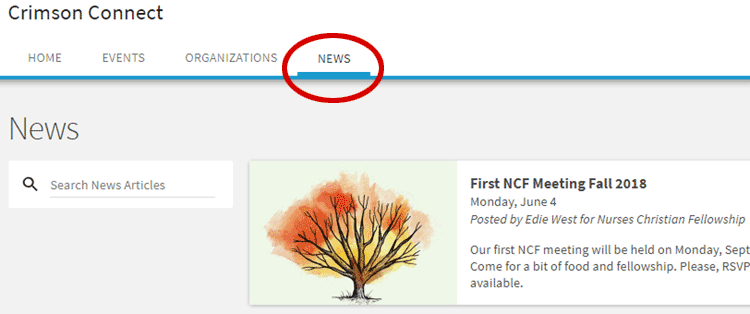
- The news feed displays all news articles posted by organizations. The news feed always displays “Public” articles and will also display “Campus Only” articles when a user is logged in.
Navigating the Action Center and Pop-Out Menu
Action Center
- Access your personal Action Center by clicking on the grid and navigating to the Manage view. You will see a list of the organizations for which you are in a leadership role leader. From here, you can click the tile for an organization to manage events, the roster, forms, etc. You also have the ability to register a new organization from this screen.
- On your Action Center homepage, you may also see an aggregated list of items that need your review. These could be form submissions or event requests for which you have been tagged as a reviewer. Click on the name of the form or event to enter into the review process.

Pop-Out Menu
Your Name
Clicking on your name will take you to your account and will allow you to edit your profile, upload a picture, update your contact information, designate interests to receive custom recommendations for organizations and events, and edit your privacy settings and notification settings. See the previous section on editing this information.
My Event History
Here, you will see all of the events you have attended and swiped into. You can view the event details, navigate to the host organization page, and leave a reflection for that event.
My Memberships
This drop-down is where you go to manage your involvement within Crimson Connect. From this section you can access and edit your organization memberships. Your shortcuts will display any organization you are a member of within the system. This is the fastest way to get to the home page for any of your organizations.
Experiences
Experiences allow you to track out-of-the-classroom activities, such as awards, conferences, study abroad, internships, or other involvement outside of the institution. Experiences let you showcase these additional activities on your cocurricular record to share with future employers, graduate schools, for scholarship applications, or for any other reason you might want to share your involvement.
Service Hours
This tool allows you to manually submit service hours that you would like to associate with a specific organization you are a part of. These service hours can be included on your cocurricular involvement record, allowing you to showcase your involvement in an organization or in the community. Note that you must be a member of an organization in Crimson Connect in order to add service hours within that organization.
Cocurricular Transcript
This gives you an overview of your progress in any cocurricular program(s) you are enrolled in through Crimson Connect, and maintains a formal list of all leadership roles you have held during your time at IUP. You can print or save the document as a PDF and use it to verify your participation in cocurricular experiences at IUP.
Submissions
If you're logged in to Crimson Connect, all of your form, election, org registration, and event submissions are saved. Anytime you advance past them to a new page of a submission, it will create a partial record on your submission list (which can be resumed at a later time). Access this page to resume any partial submissions or view the status of completed ones.
Notifications
This is your message inbox within Crimson Connect. Depending on your notification settings, you may receive messages to both your @iup.edu email address and your Crimson Connect inbox.
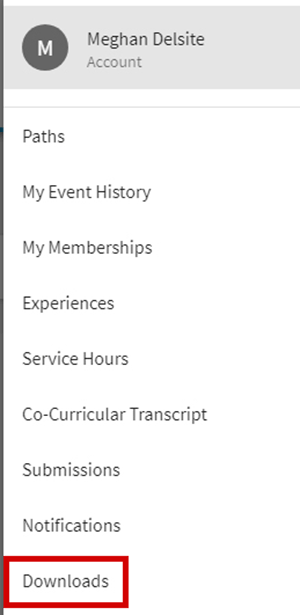 Downloads
Any download you request (transcript, event attendance list, etc.) will be listed here for you to access at any time.
Joining a Student Organization
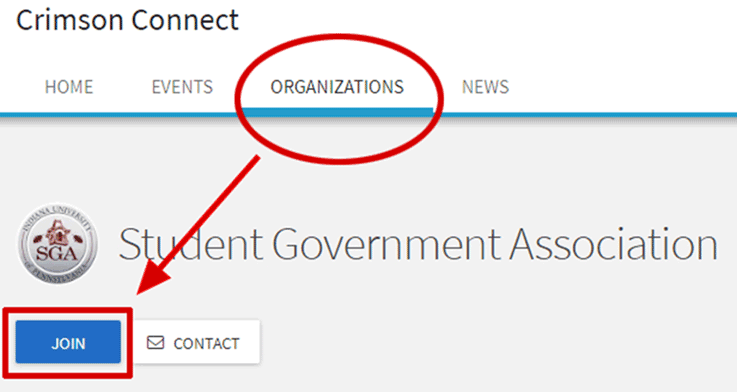
- Joining a student organization on Crimson Connect is easy! After you have identified the group you'd like to join, navigate to their page on the website. Then, simply click the Join button in the top right corner, and your request will go through. After that, if you meet the requirements for membership, an officer in the organization will approve your request, and you'll be added to the page.
- Alternatively, you may be invited to join the Crimson Connect page. If this is the case, you will receive a message through your IUP email account that will include a link. If you're interested in joining the organization, then click on the included link. If you already have a Crimson Connect account, then you will automatically be added to the roster. If you don't have an account, you'll be prompted to create one using your four letters.
Logging Your Service Hours
Crimson Connect offers a service hours tracker that allows users to log and maintain a record of their volunteer work completed for an organization. Simply follow the steps outlined below to get started.
- Find Service Hours in the right-hand pop-out menu on the right under your initials or photo. You can also find Service Hours at the bottom of the left-hand pop-out menu on your organization's page.
- On the Manage Service Hours page, you can see how many pending, approved, and denied service hours you have with each of your organizations. As an executive board officer, you can approve service hours in the Manage Organization function by clicking the box to the left of the name of the submitter, then clicking Approve to the right.
- To submit service hours, click the + Add Service Hours button in the top right-hand corner of the screen. Be sure to complete all required fields, and provide a contact to verify the hours.

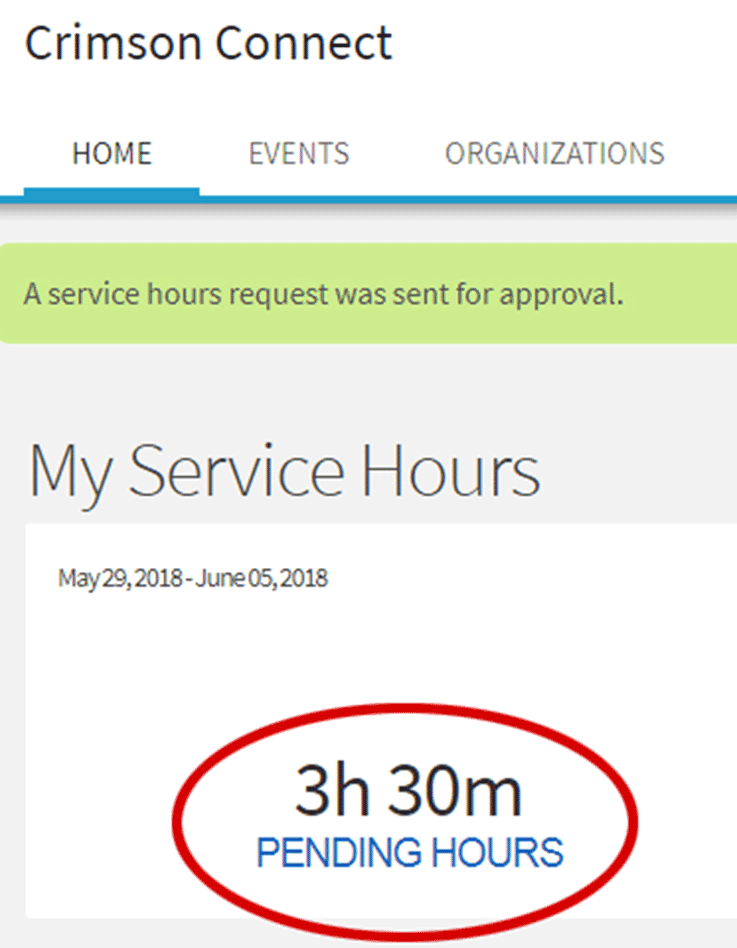 Once you have submitted your service hours, the number of hours you submitted will appear under “pending hours” until the administrator of your organization approves them.